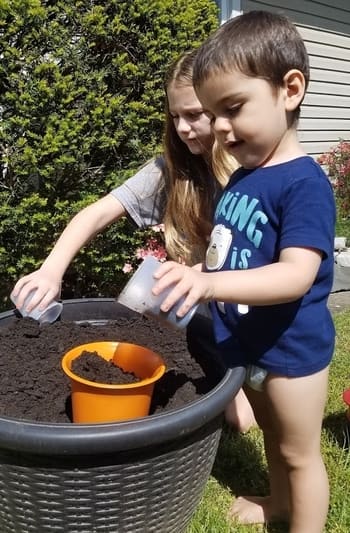
Creating miniature fairy gardens turned out to be an ideal pursuit for a sunny morning with my grand kids. Take a childs joy of digging in the dirt and add in pretty plants and whimsical buildings and you get delightful little lands made by creative little hands.
Many Fairy Gardens you see online are elaborate detailed worlds created by adults using expensive materials and lots of building skills. You don’t have to go to all that trouble and expense. You can create simple yet beautiful gardens with the kids that are super easy and cost very little money. I plan to make a few different crafts this summer so I purchased a bunch of items to use both now and in the near future. Here is a breakdown of how much I spent total and what our four gardens ended up costing.
| Material | Total Cost | Unit Cost | Total for 4 |
| Containers | $25.99 for 12 | $2.16 each | $8.64 |
| Plants | $89.96 for 44 | $2.04 each | $8.16 |
| Potting Soil | $2.99 for 20 lbs | $0.04 for 4 oz | $0.15 |
| Figurines | $27.86 for 47 | $0.59 each | $2.36 |
| Rocks | $1.00 for 15 | $0.07 each | $0.21 (3) |
| Gravel | $6.98 for 6.6 lbs | $0.11 for 1 oz | $0.22 (2) |
| Totals | $154.78 | $5.01 each Unit | $19.74 |
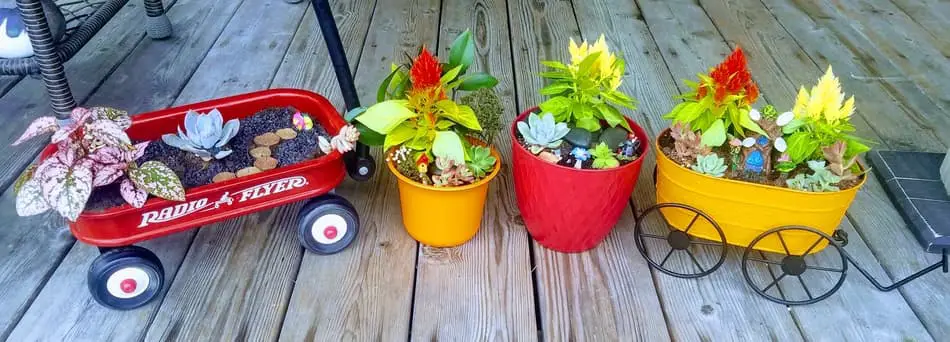
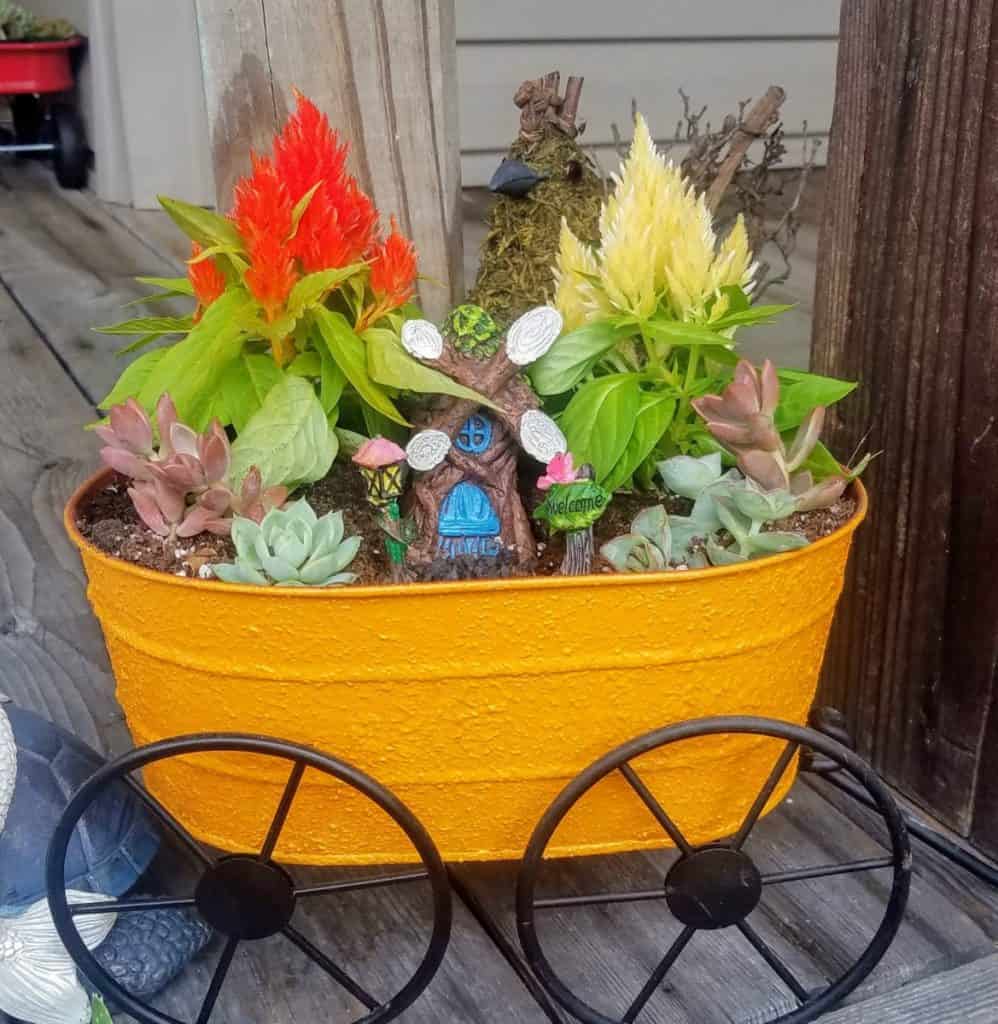
I purchased an inexpensive potting soil from my local hardware store. The Celosia and Hypoestes came in flats that I got at the supermarket. The Radio Flyer was $14.97 and the succulents were $2 each, both from Amazon. The other containers, figurines, gravel and rocks were all from the local craft store or dollar store. Lastly, the orange wagon I found at a yard sale last summer for $1.
I also used in one of the gardens some Babys Breath and green leaves that came from flowers I received for Mothers Day. So, free. Speaking of free don’t forget about what you can find in tour own backyard. You can use twigs and pebbles as well as moss and leaves.
If you would like to get items from Amazon you can click here to see recommendations on the Products We Love page . As an Amazon Associate I earn from qualifying purchases.
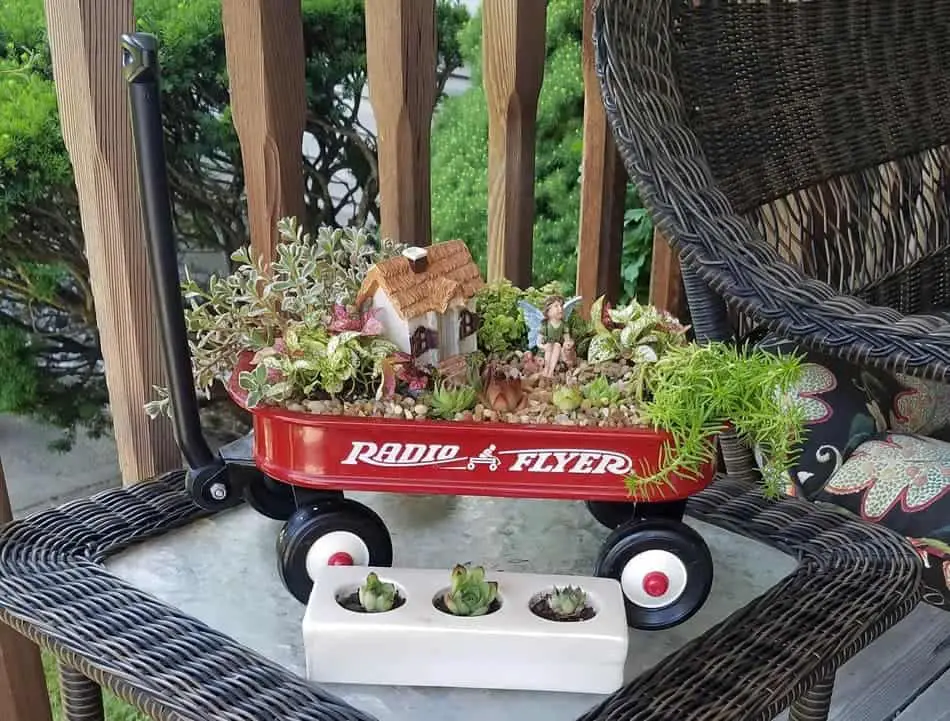
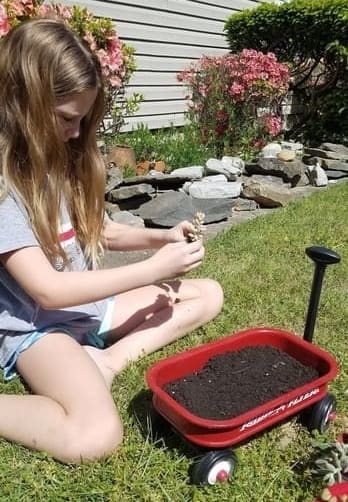
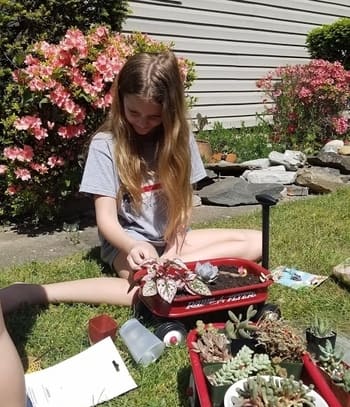
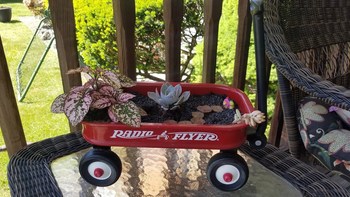
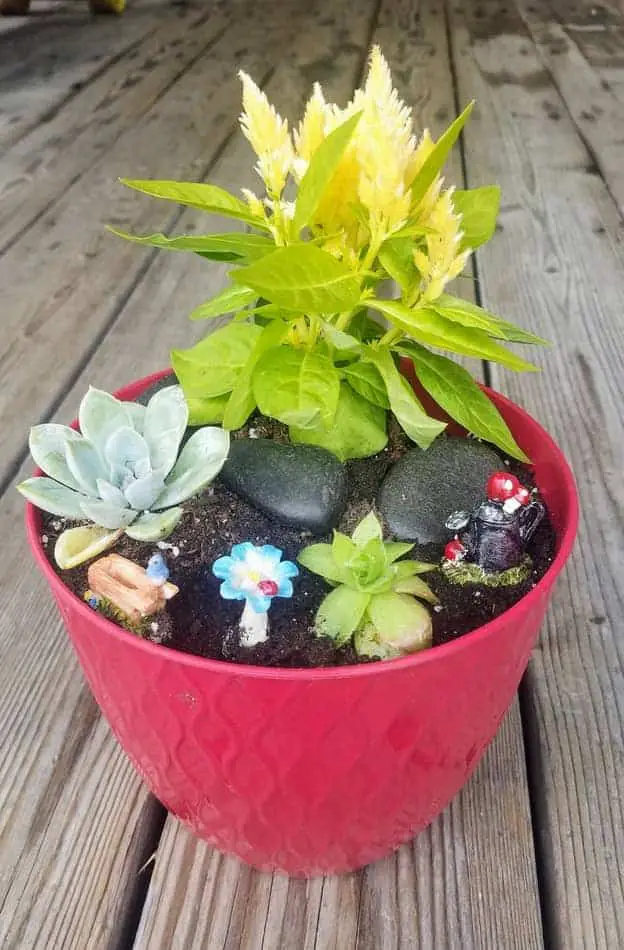
I had this pretty little garden in a Radio Flyer wagon a few years ago that I really loved and I wanted to create another one. When I purchased a new wagon with the intent of making the new one, it was quickly taken by my two and a half year old grandson and labeled “Mine.” Fortunately I outsmarted him because I still had the old one too. Enter my ten year old granddaughter. You guessed it. One wagon spends most of its time pulling cars around the living room and the other my granddaughter used to make her garden. I got to use the little orange pot.
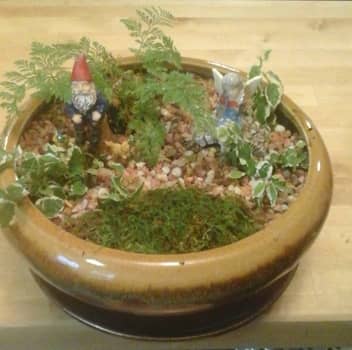
This was a great activity for us to do together. I happen to have a bit of a control issue and this project allowed me to let go a bit and give the kids the freedom to use whatever plants and accessories they wanted. My younger daughter had to help my grandson with his garden when it was revealed that his only interest in making the garden was shoveling the soil from one pot to the other pot. My granddaughter on the other hand, wanted to do hers with no help at all. She did however accept a bit of advice after she broke her first plant while taking it out of the pot. Otherwise it was her garden from start to finish. This is where the letting go was important because I caught myself ten times starting to say, “Is that all you’re going to put in there.”
You start your fairy garden by putting some soil in your choice of container. It’s then best to choose and place the larger plants in the container and add additional soil around them to secure them.
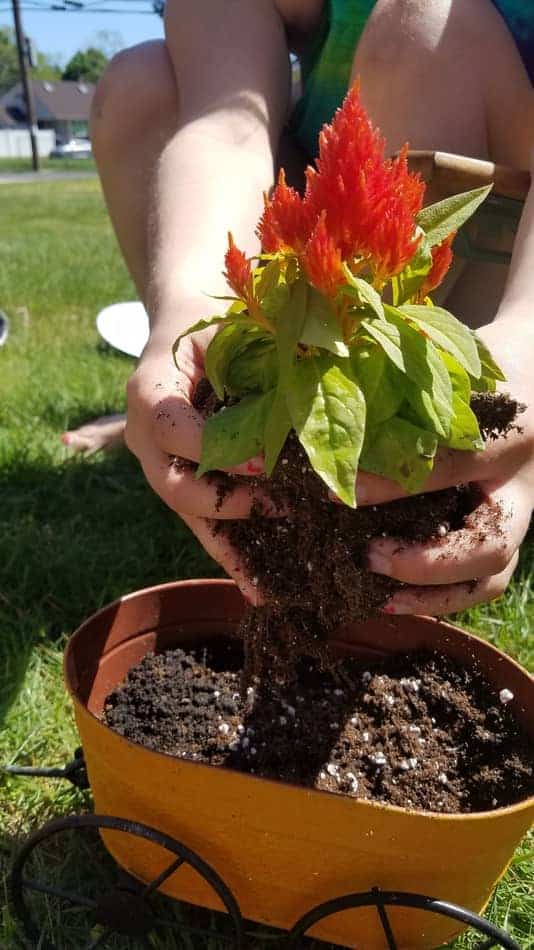
When adding plants to the container you do want to remove some of the soil from the base of the plant and loosen up the roots. When you put the plant in the new container make sure to pack it tightly with new soil.
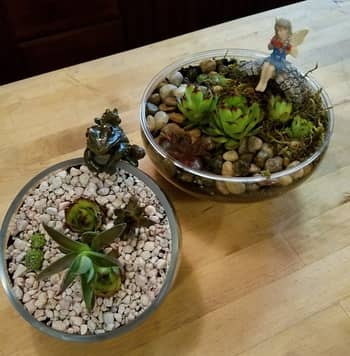
I like to then add any buildings, Fairies, Gnomes or other creatures. Pathways and bridges, as well as the smaller plants I tend to do at the same time moving them here and there until I decide what I like. It’s important to save any gravel you want to add until the very end, it’s not easy to move if you want to change your design.
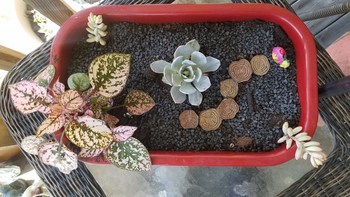
Having different plants and accessories available to choose from is nice because it allows you to play with the design. Even though the three of us all chose to use the Celosia as our feature plant, all of our gardens look different.
Mixing plants works fine in the garden because when I water them I only water near the base of the Celosia. The succulents don’t require a lot of water and they manage to collect enough by mere proximity.
As you can see, creating a fairy garden can be fun and inexpensive. While my granddaughter, Savanna, kept her garden clean and simple, my grandson, Max went heavy on the accessories. My daughter Ty and I just did what we liked.

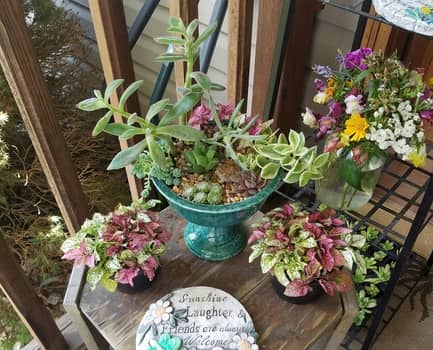
Be experimental with your container choice. It doesn’t have to even be a planter. In the past I have used a candy dish and a tea pot. Here are some of my first attempts. I feel like with everything in life, they got better with practice.

Sometimes you can do away with the container completely and go big. I came across these photos of the very first fairy garden I attempted years ago under a tree in my mothers backyard.
The point is just to have fun. Be creative. Let your imagination be your guide. It’s a great way to get the kids interested in plants which I hope will lead to an interest in gardening. My granddaughter is already asking when we are going to make more and she has even taken one of the new succulents, transplanted it into an old pot she found and named it Fred. As for my grandson, well, put it this way, it may not have been the smartest idea to use a little red wagon and then tell the two year old he can’t touch it.
